Step 1
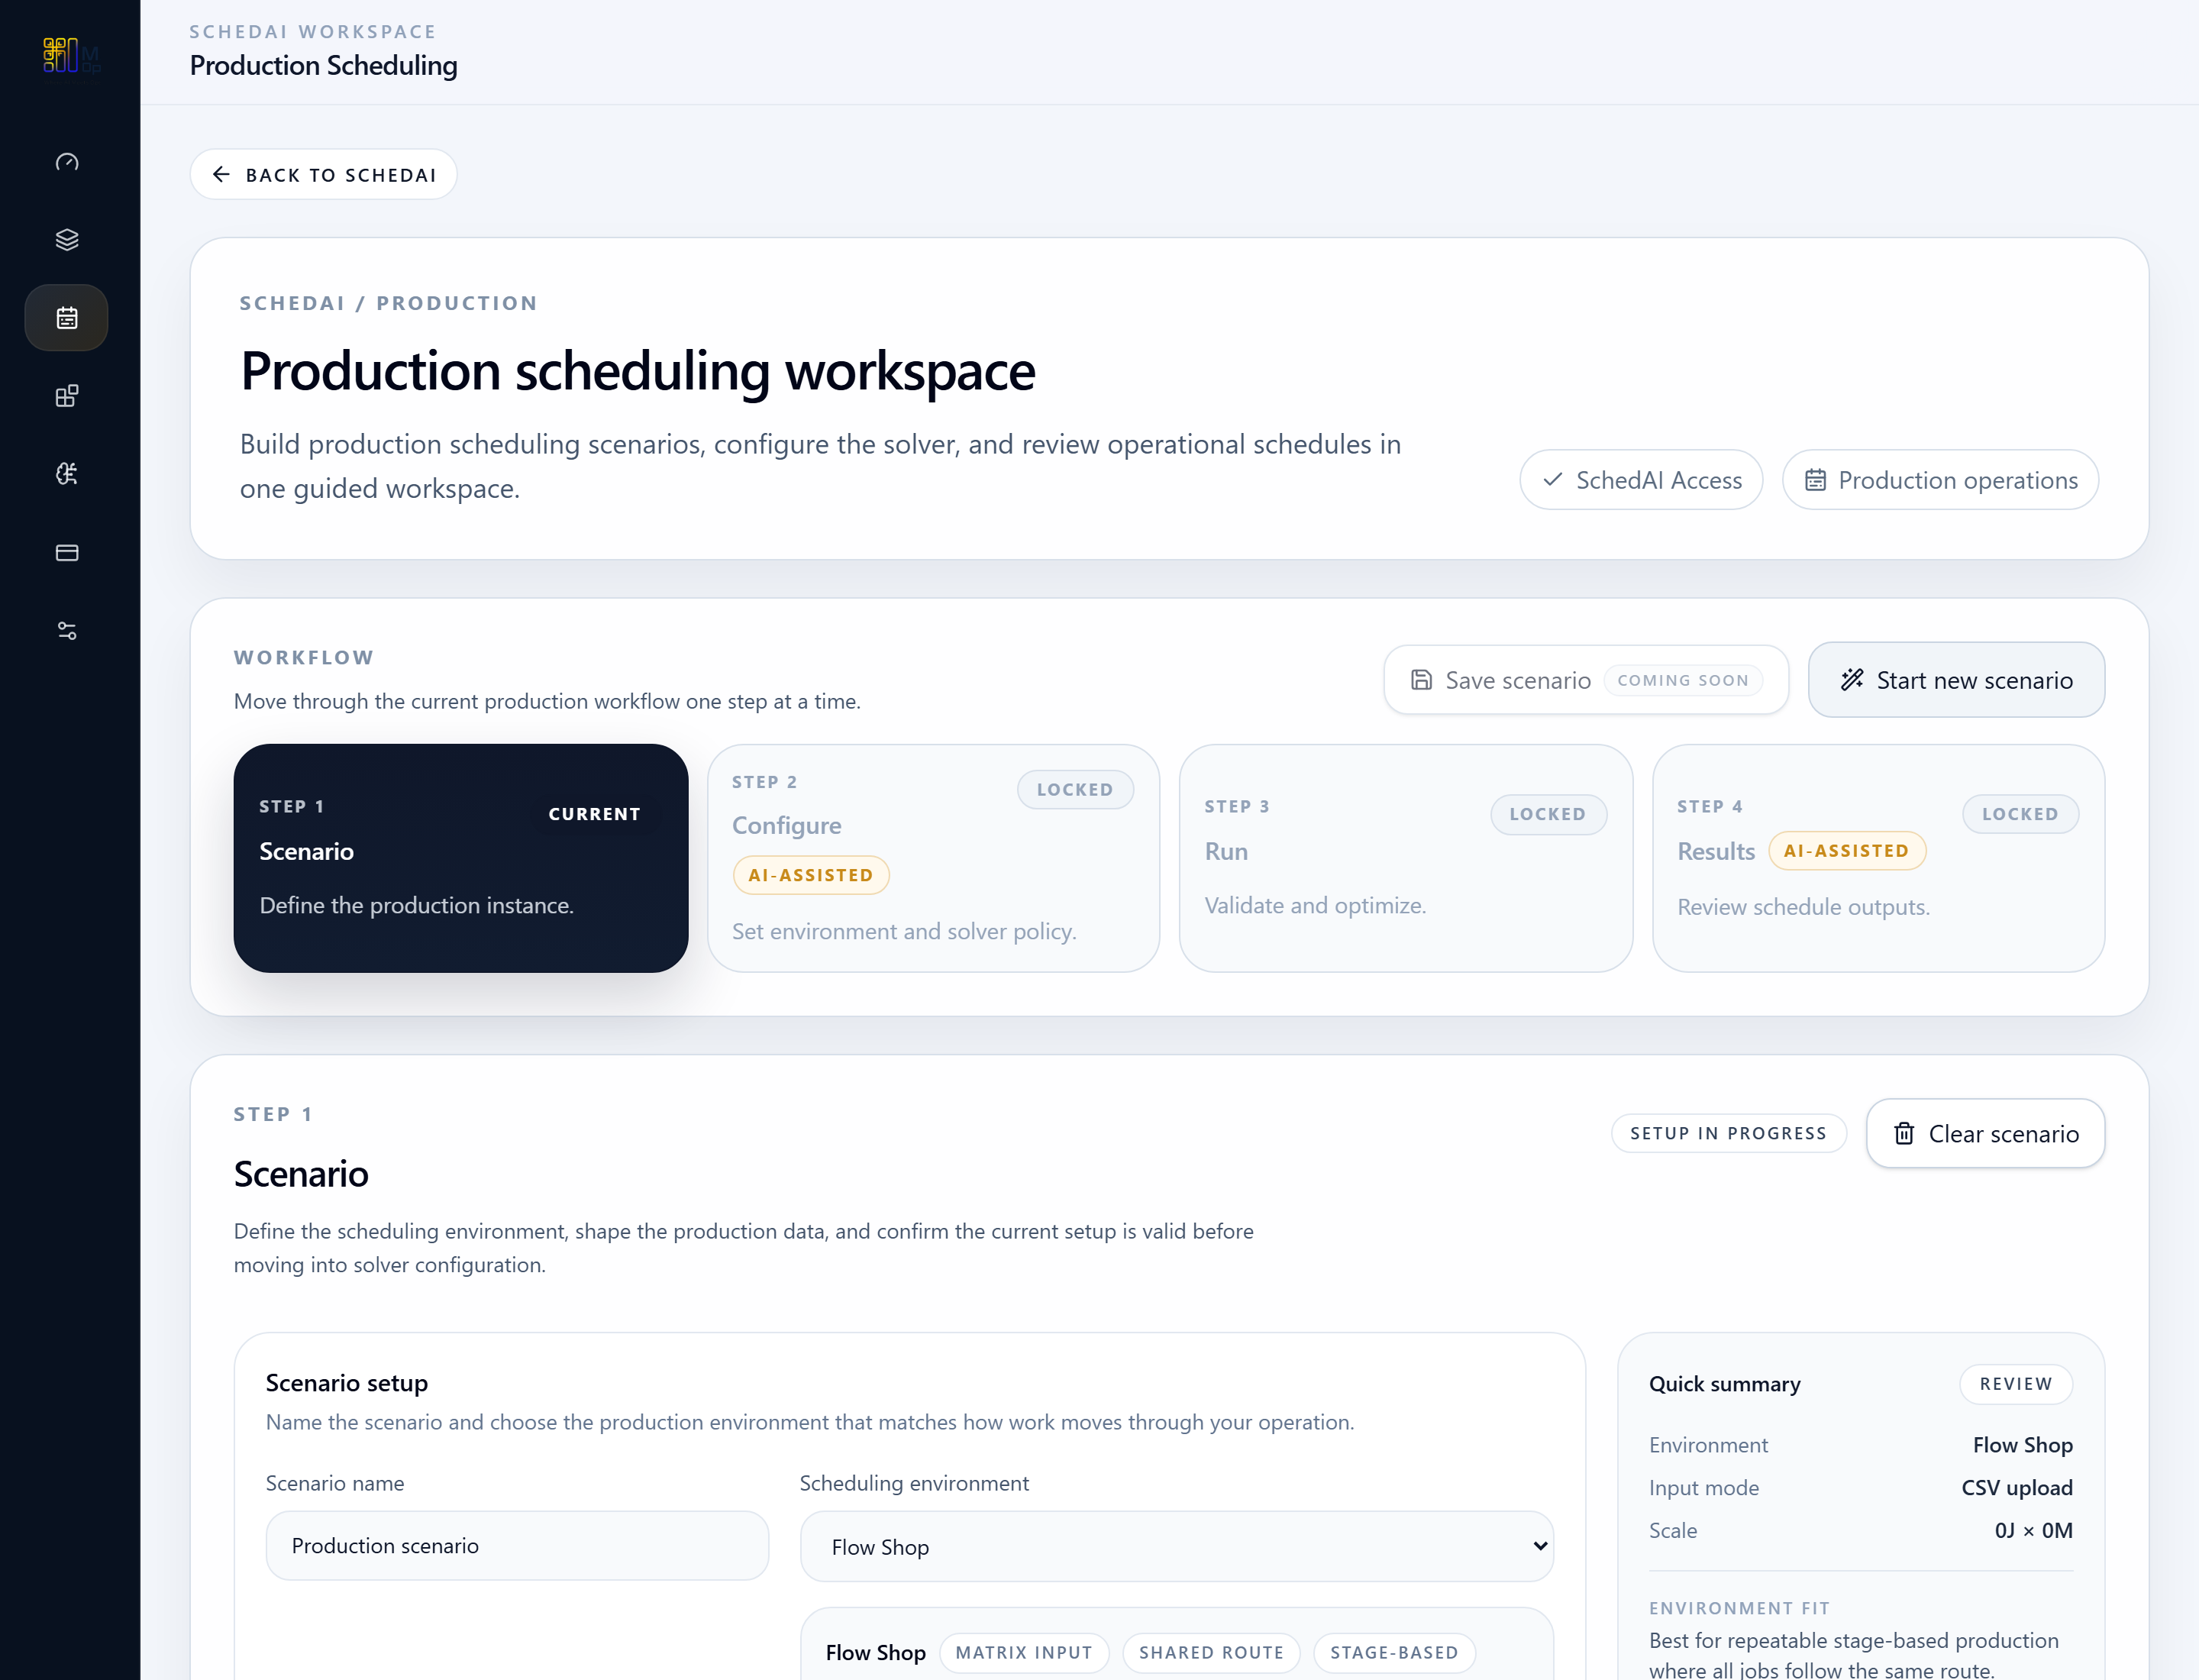
Open the workspace
Start in the Production workspace and orient around the four-step shell before staging any data.

SchedAI Quickstart
Move from scenario setup to an optimized production schedule, then review the timeline, KPIs, and assignment outputs.
Follow the workflow step by step, using the screenshots where available and the concise action notes throughout.
Before you start
Step 1
Start in the Production workspace and orient around the four-step shell before staging any data.
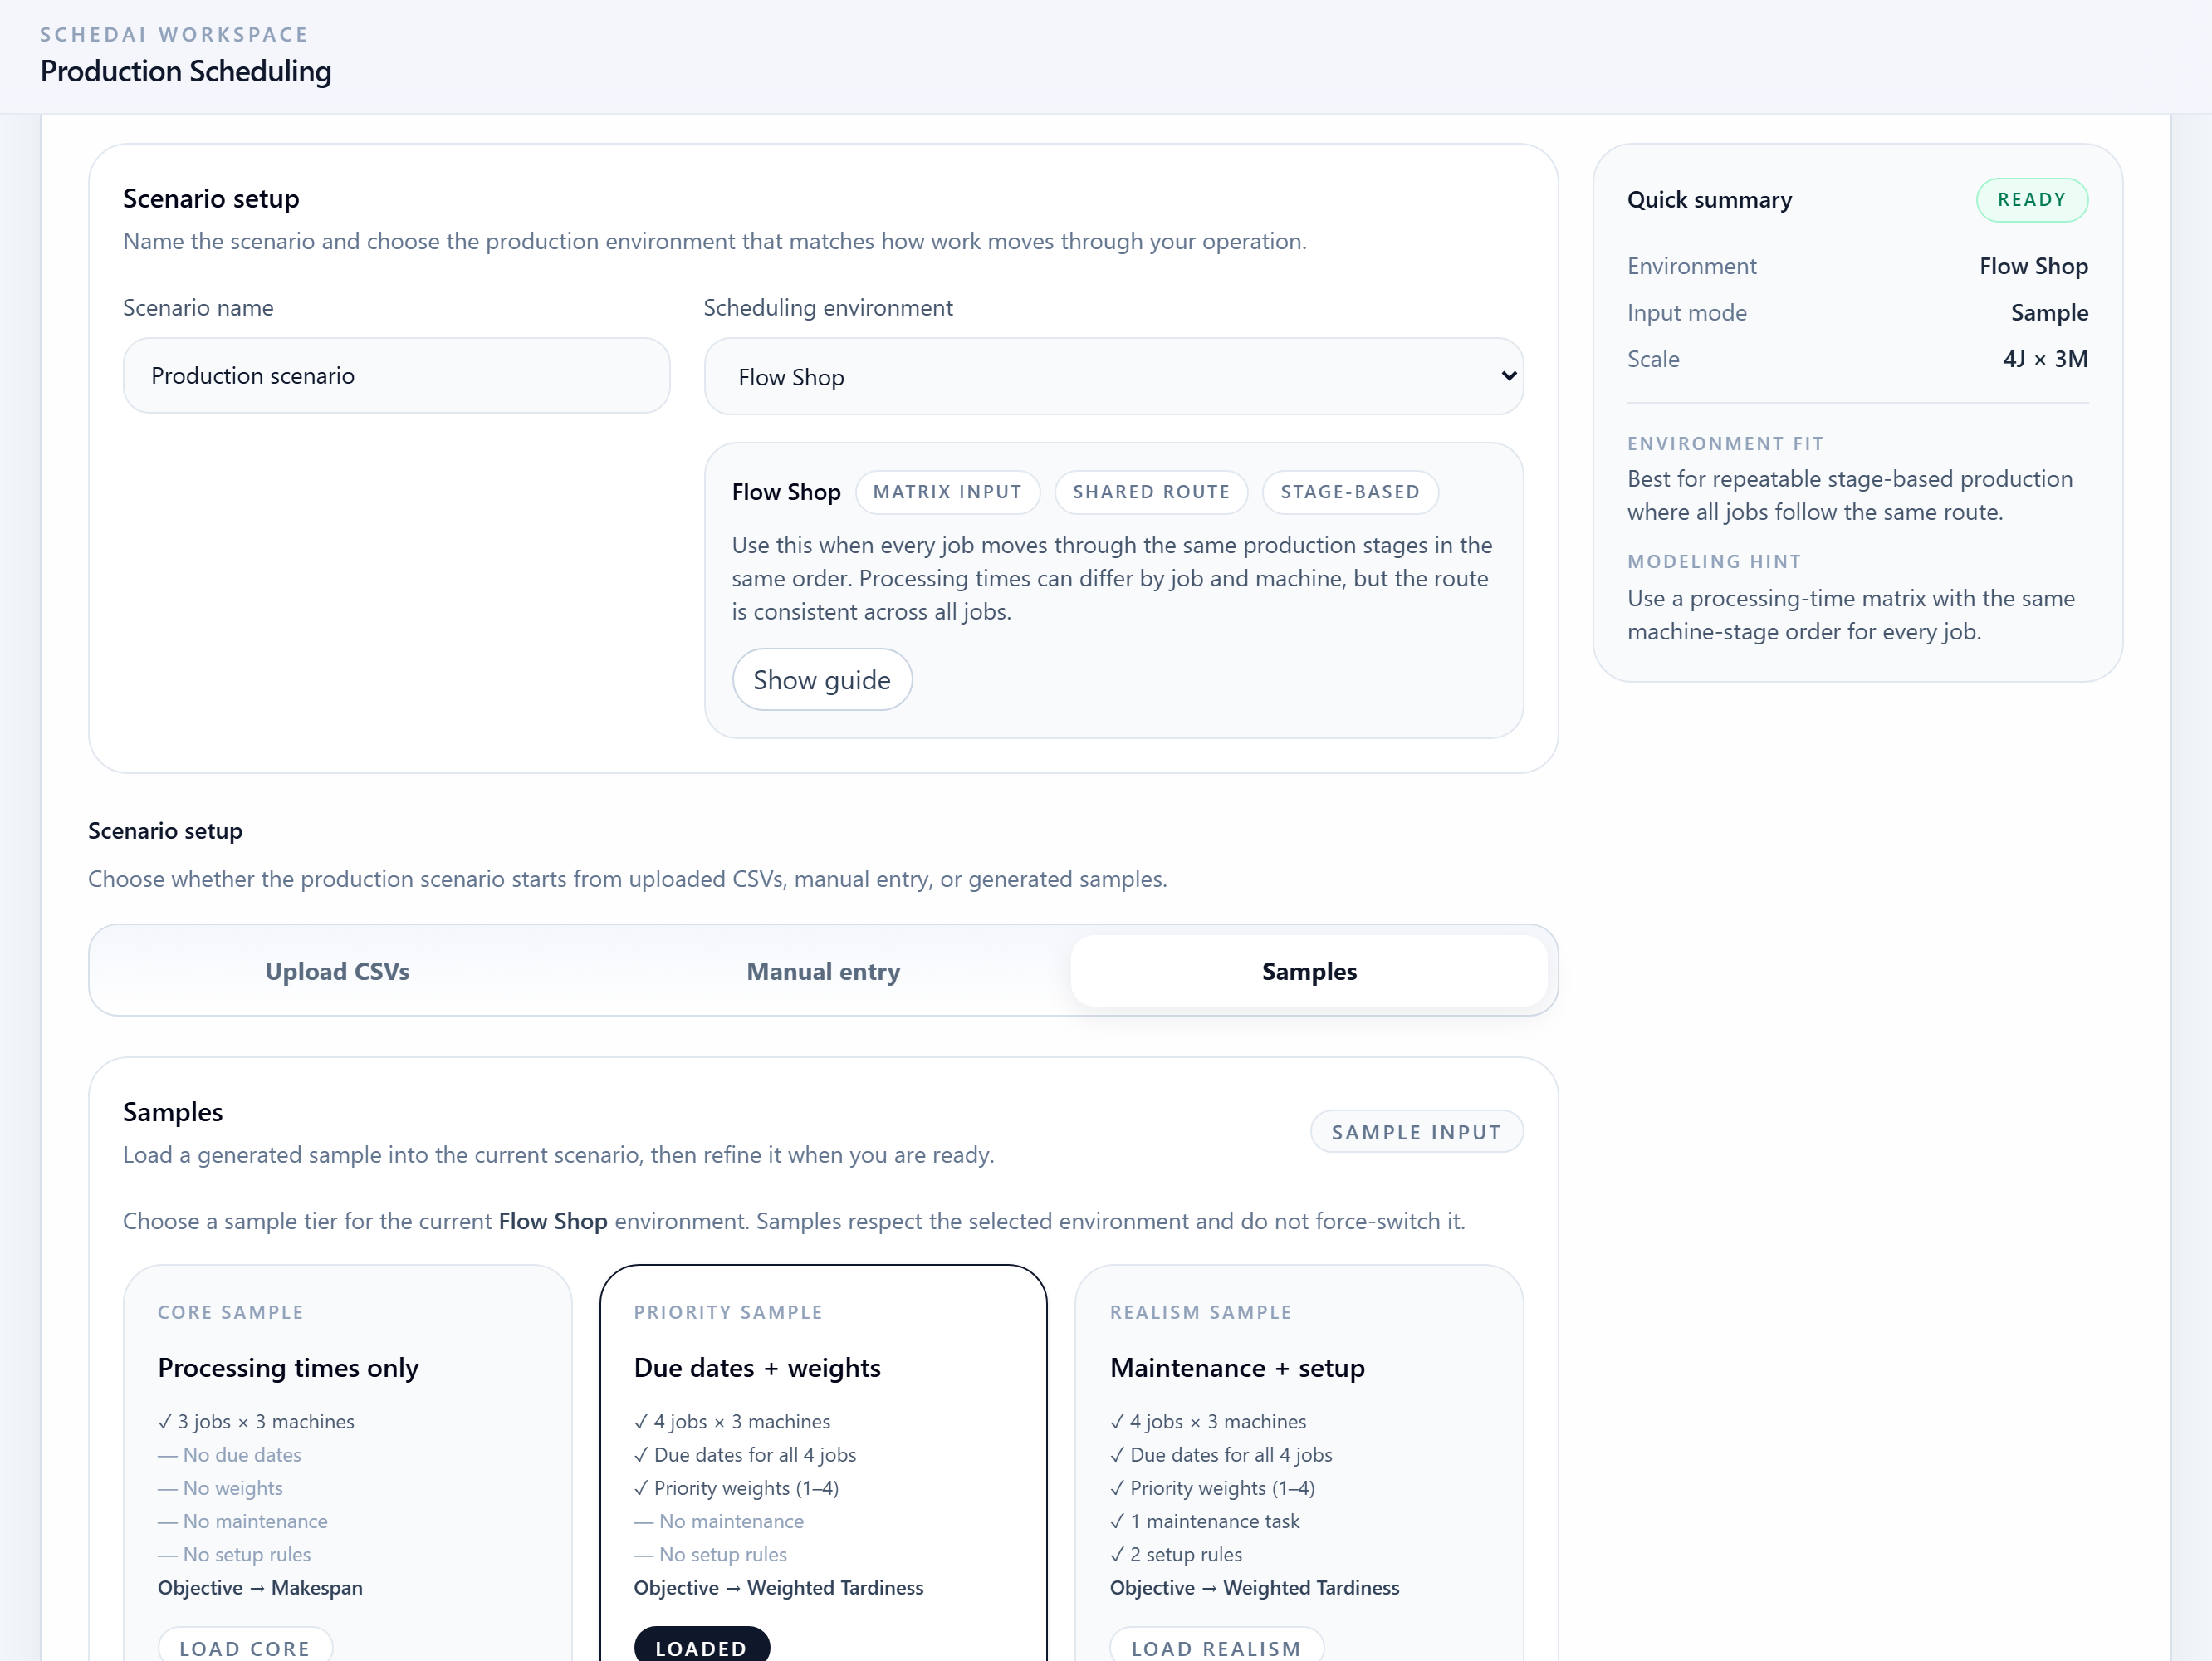
Step 2
Upload CSVs, choose manual entry, or load a sample that matches the selected production environment.
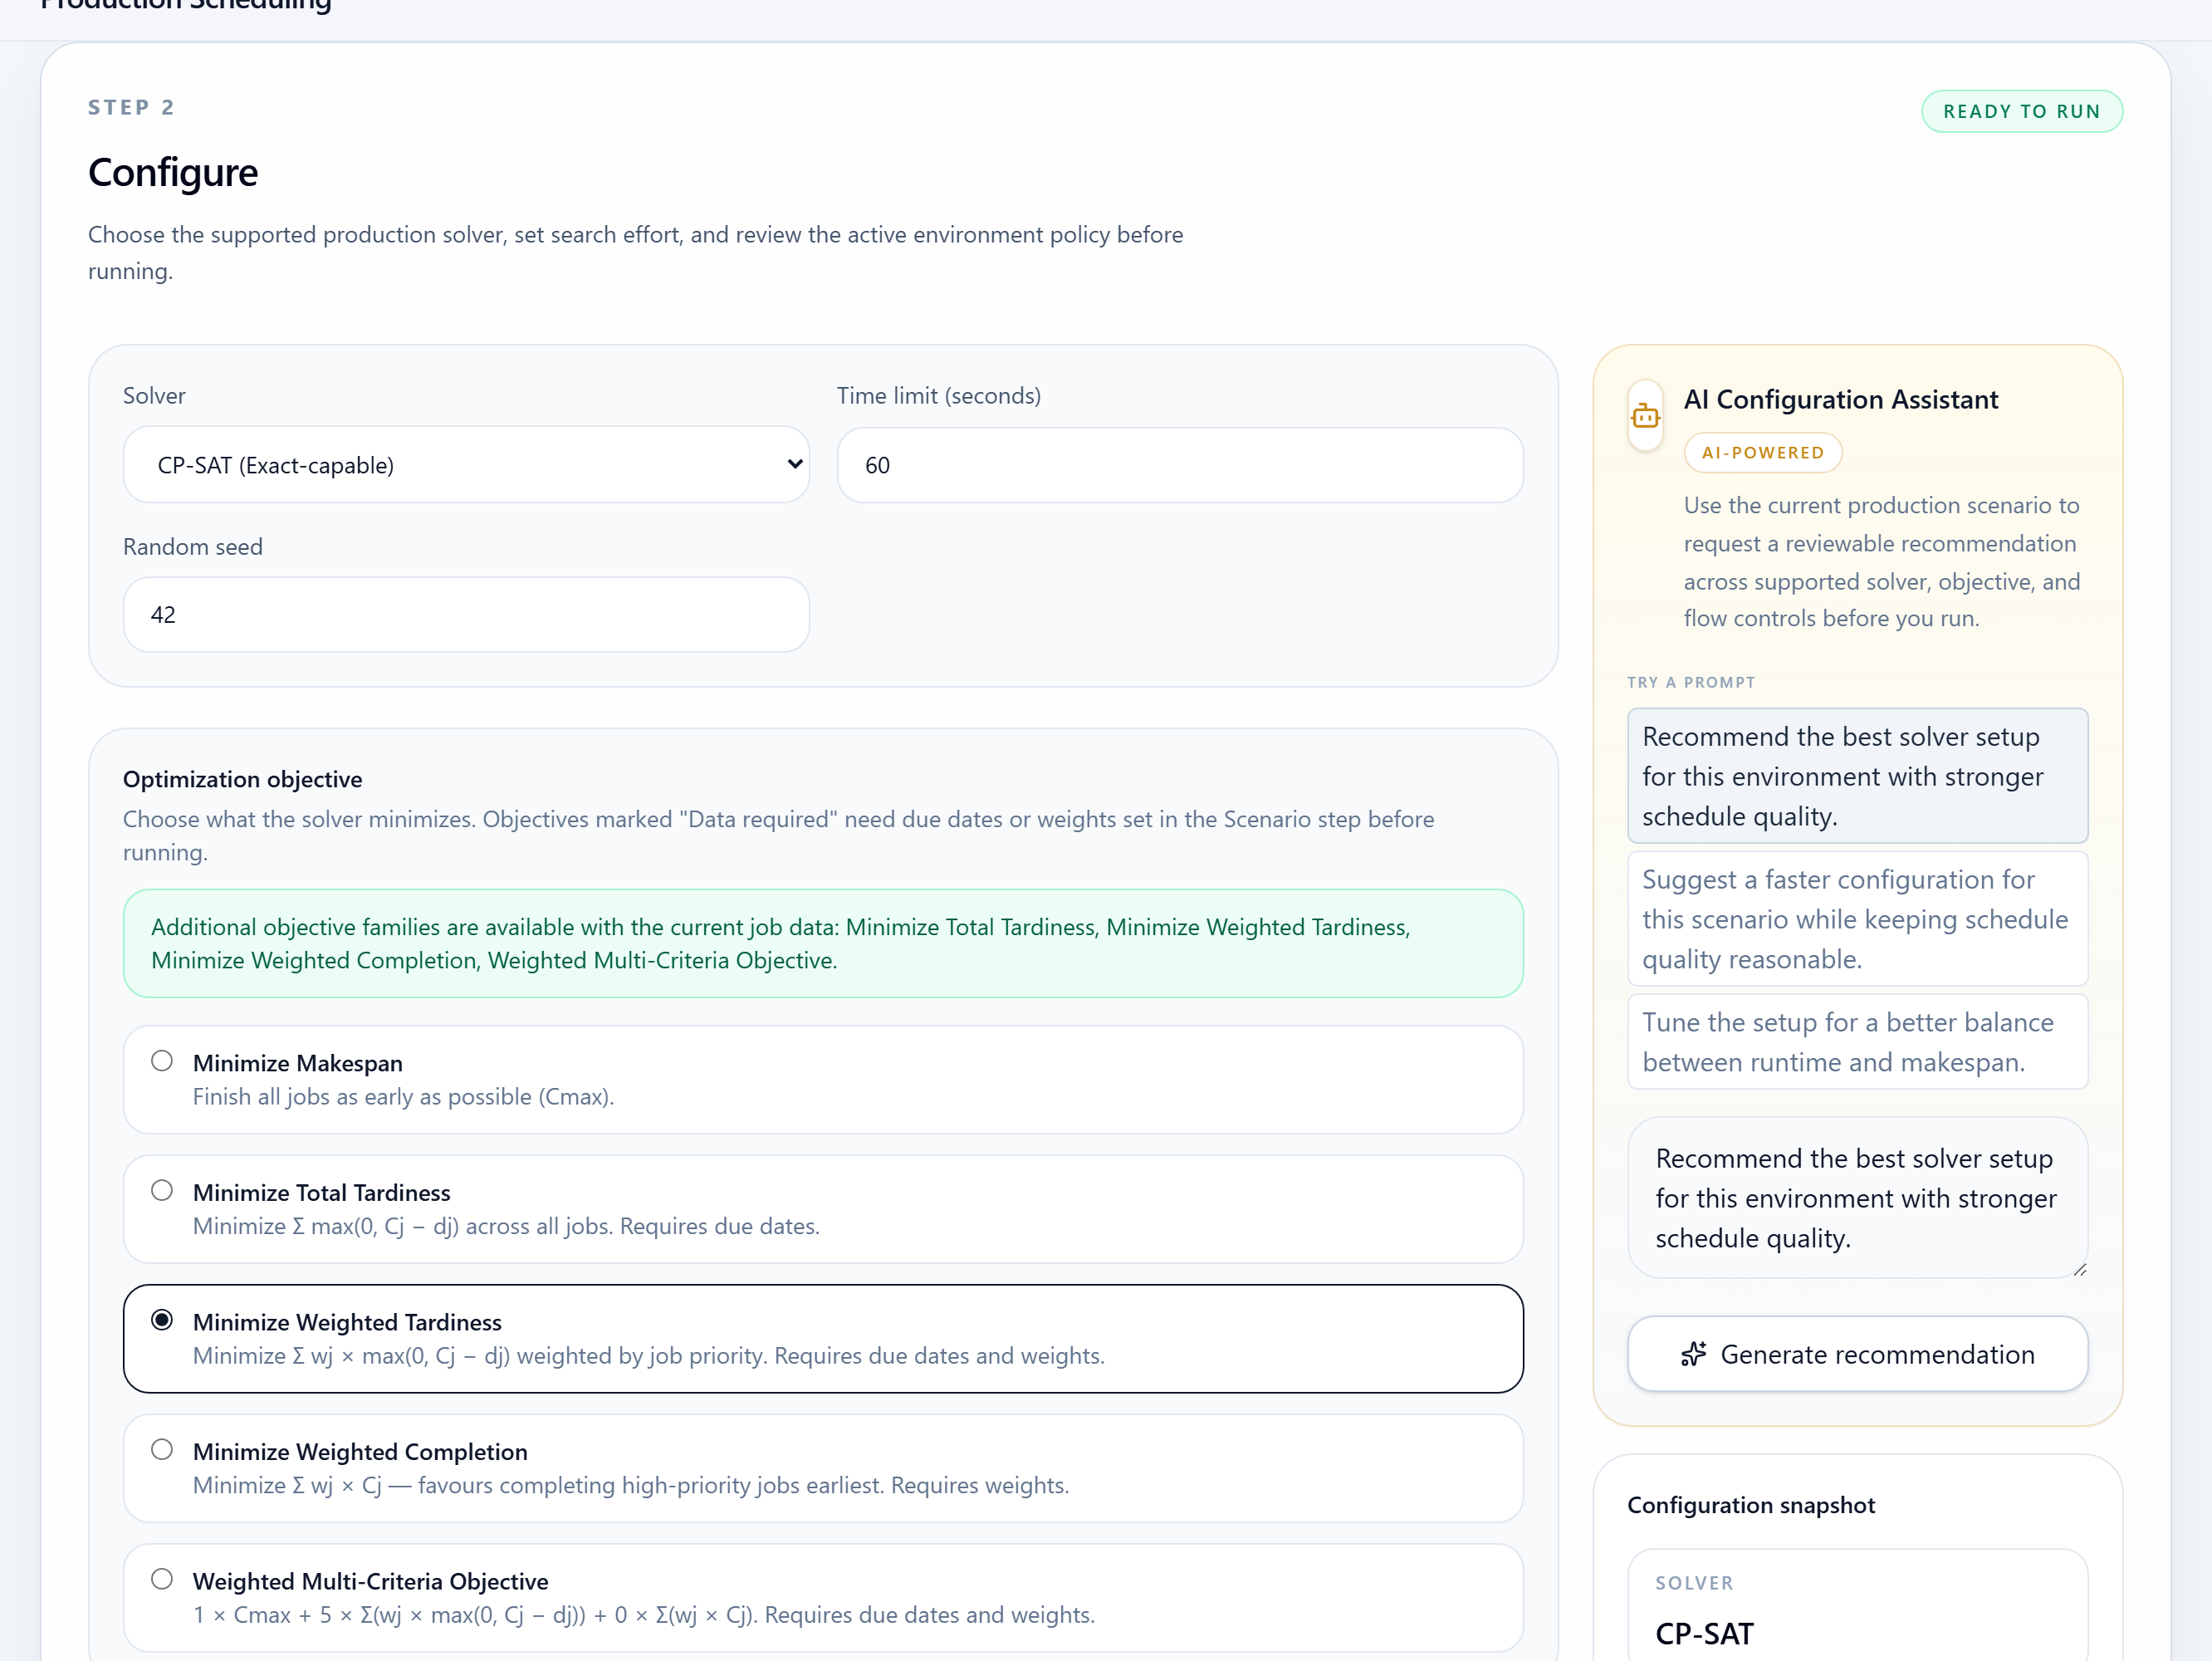
Step 3
Review the objective, solver policy, and any environment-specific readiness notes before running.
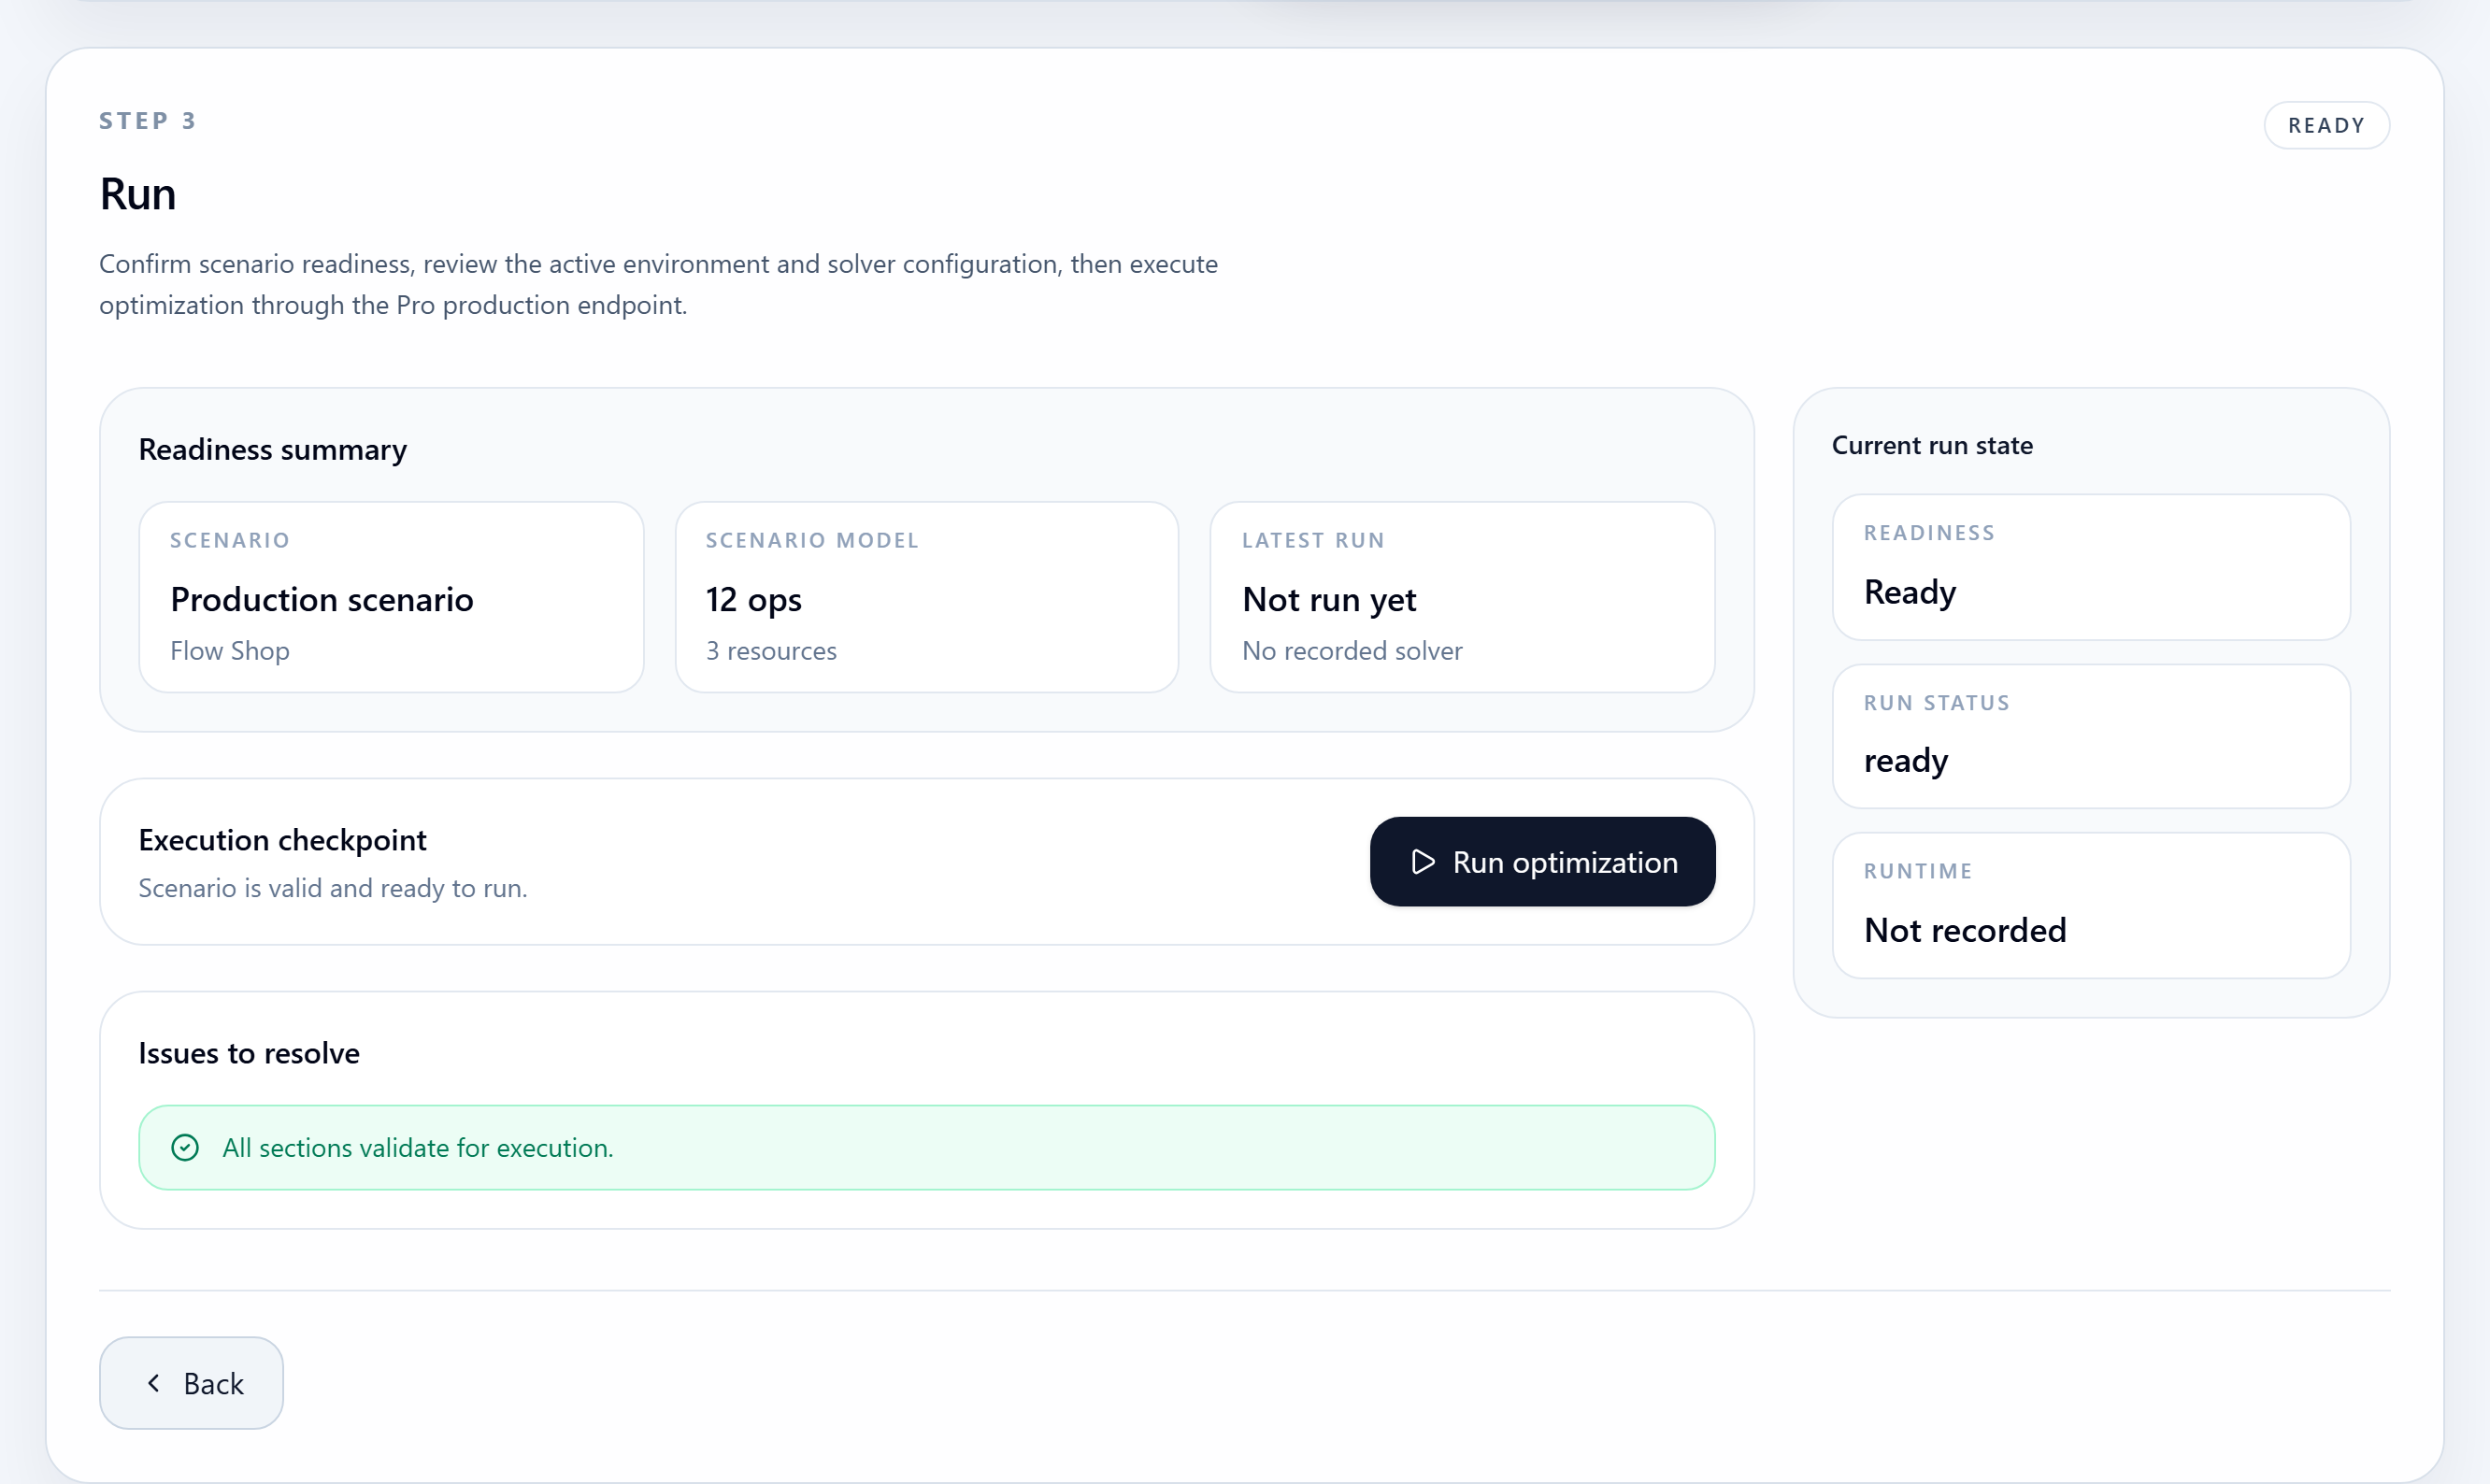
Step 4
Use the run step once the scenario and configuration are both ready for execution.
Step 5
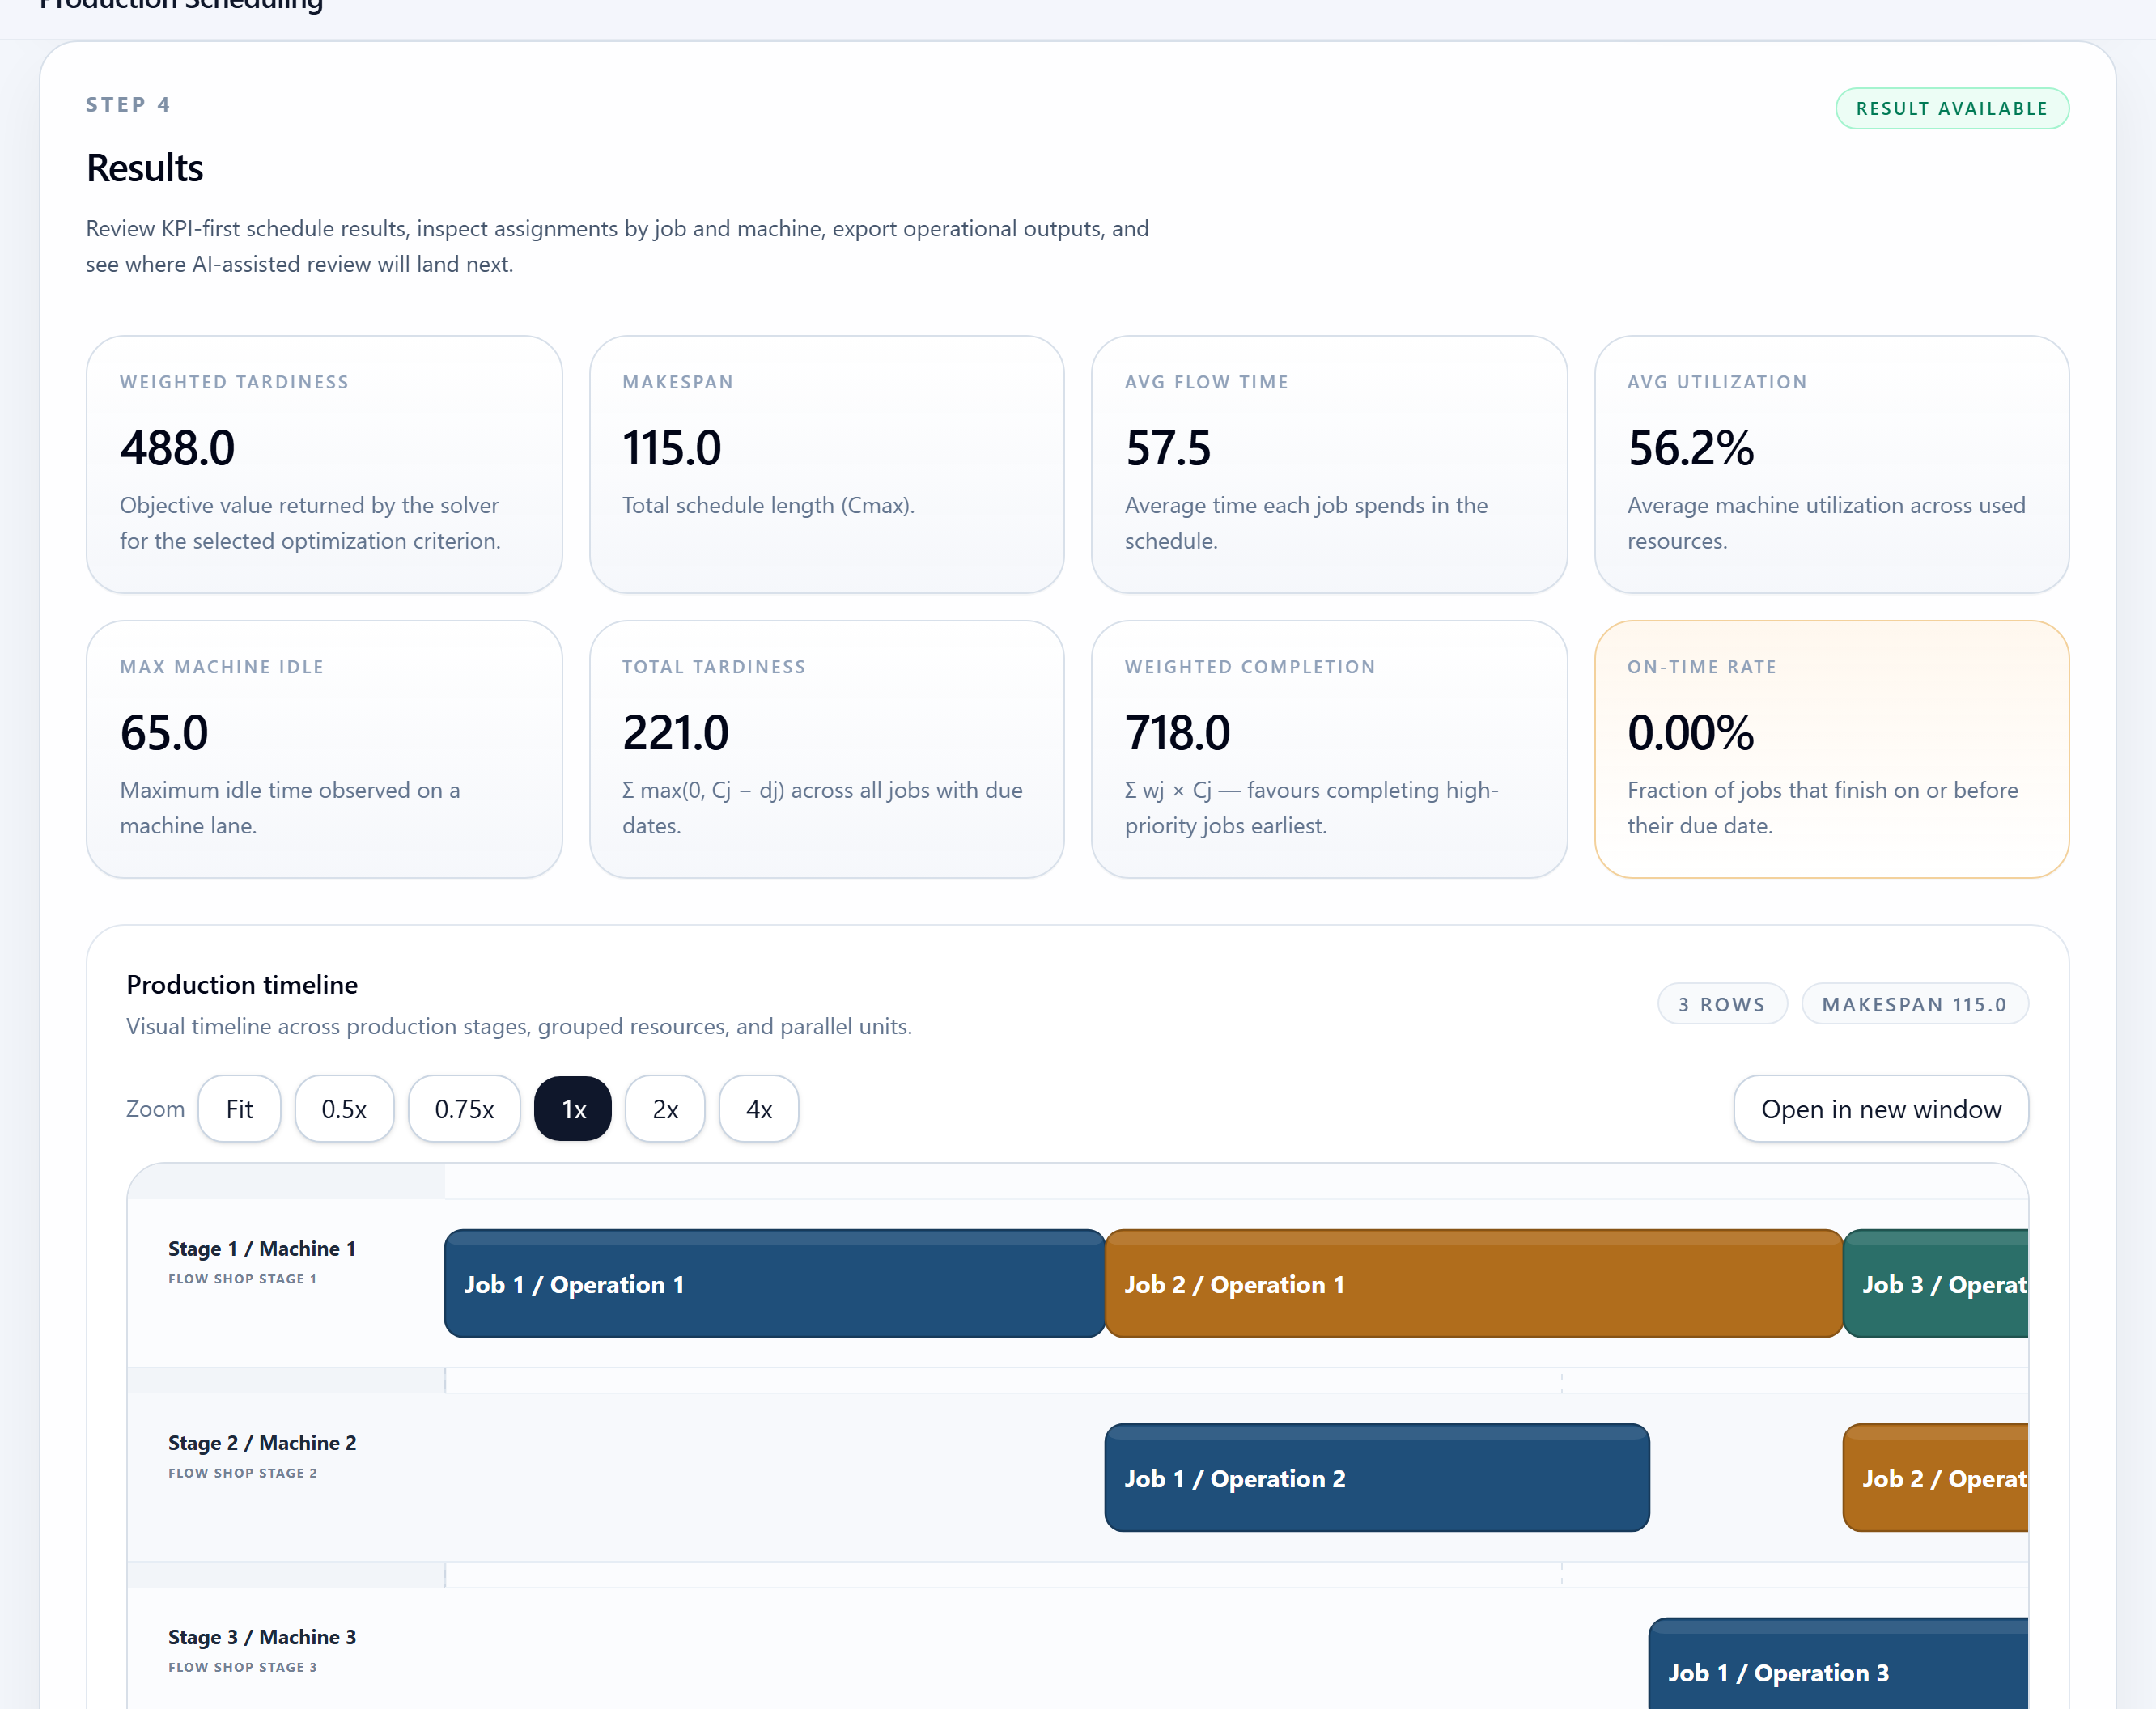
Inspect KPI cards, the production timeline, and assignment tables to decide whether the result is ready for use.
Expected outputs
Common mistakes
Next steps
Open the live workspace when you are ready to execute, or use the related product, use case, and spec pages when you need more context first.
Navigate
Return to the quickstart index for another product walkthrough, or go back to the resource hub for use cases, input specs, and how-to guides.