MAG OptiAI

Data and runs How-To

How to prepare and upload your data

Use this checklist to prepare your data before moving to configuration. Open the input spec, match the required format, upload your files, and confirm the workspace is ready.

Guide details

Audience

Product users

Time

5 minutes

Category

Data and runs

What this guide covers

Use this checklist to prepare your data before moving to configuration. Open the input spec, match the required format, upload your files, and confirm the workspace is ready.

Understand what a CSV file is

Review upload requirements

Choose sample, upload, or manual entry where available

Upload required CSV files

Read validation status

Confirm setup readiness before continuing

Data setup

Prepare and upload your data

Use this checklist to prepare your data before moving to configuration. Open the input spec, match the required format, upload your file, and confirm the workspace is ready.

What is a CSV file?

A CSV file is a simple spreadsheet-style file used to organize data in rows and columns. Each row represents a record, and each column represents a field such as job ID, machine, date, quantity, duration, or location.

Before uploading

Make sure your CSV columns and formats match the input spec for the selected product.

Step by step

Follow the task path

Each step gives you the action, the reason it matters, and the visual state to look for before continuing.

1

Step 1

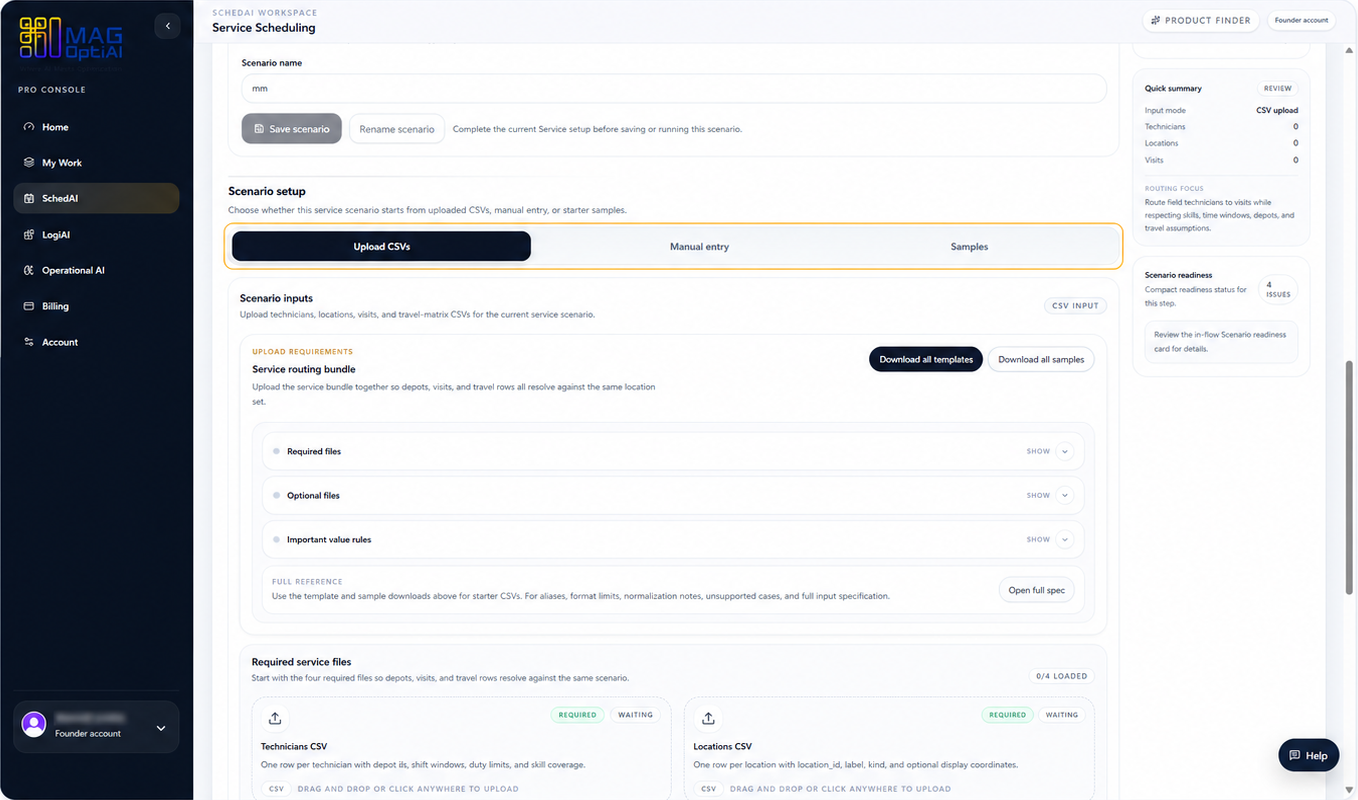
Review the upload requirements

RequirementsInput spec

Before preparing your file, review the upload requirements for the selected workspace. Check the required files, optional files, important value rules, templates, samples, and full input spec.

Data setup

Prepare and upload your data

Review the workspace requirements before preparing CSV files. Check required files, optional inputs, examples, templates, and the full input specification before uploading.

Before uploading, make sure your CSV columns and formats match the input spec for the selected product.
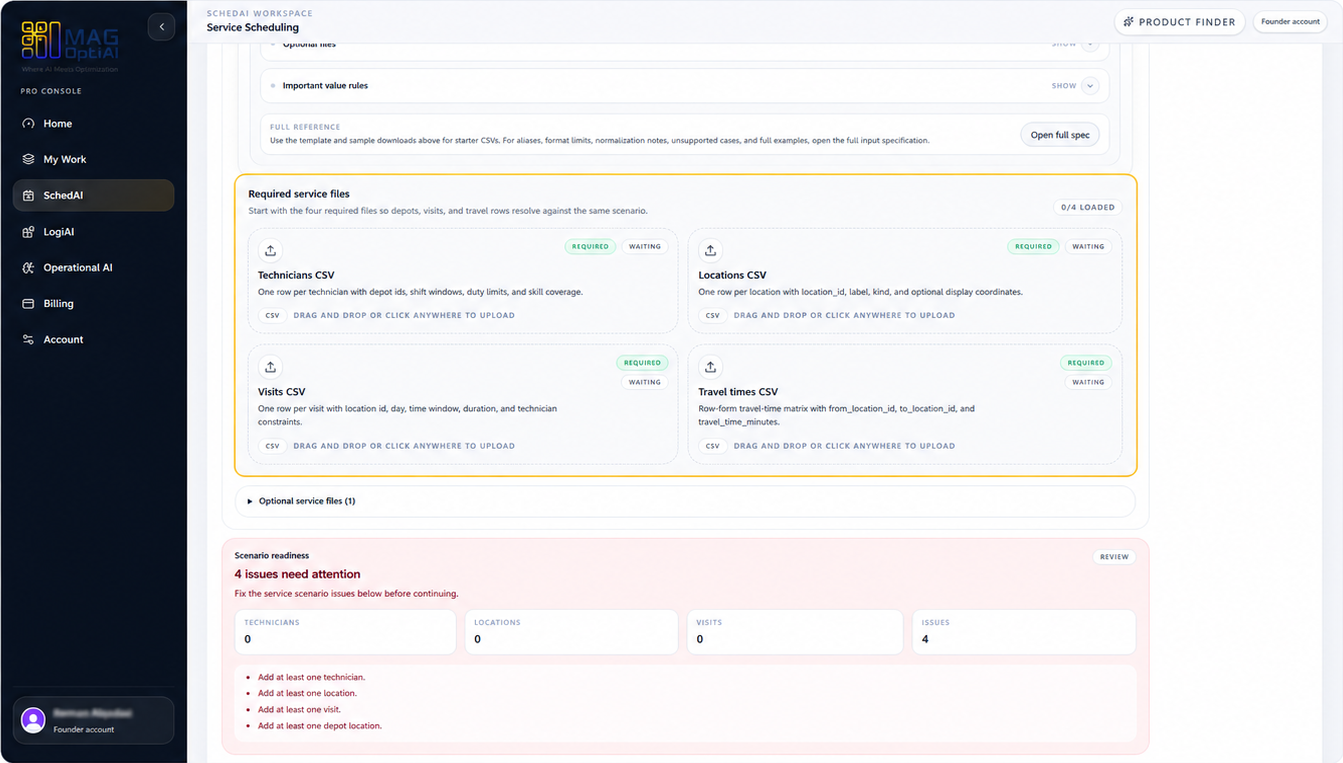
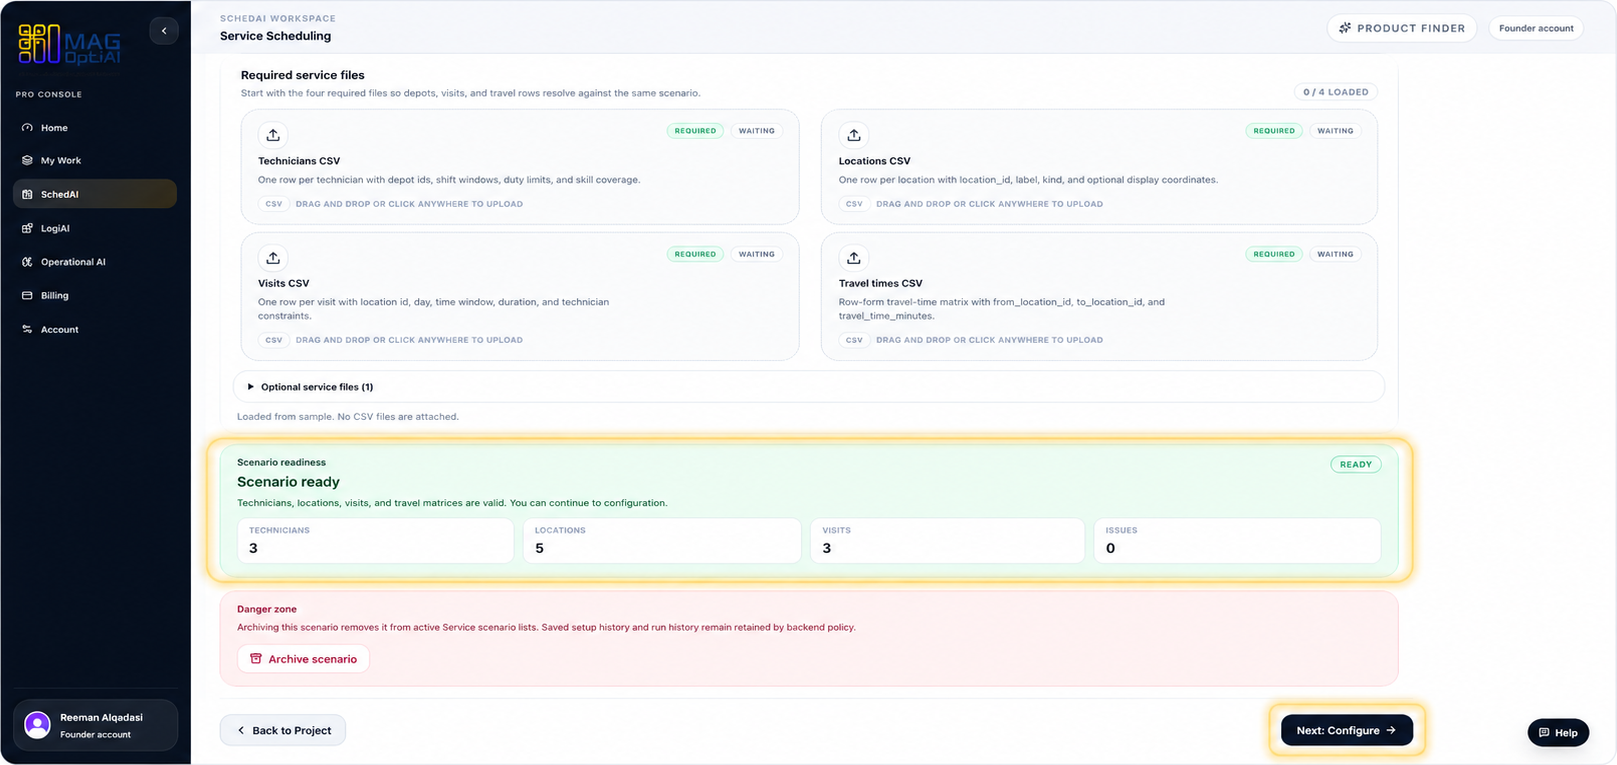
Required files

Confirm which CSV files must be present before the workspace can continue.

Optional files

Check which supporting inputs can improve the result but are not mandatory.

Templates and samples

Use examples to compare headers, IDs, dates, and accepted value formats.

Full input spec

Open the product input spec when you need column-level rules.

Review the workspace requirements before preparing or uploading your file.
2

Step 2

Choose how to add your data

UploadManual entrySamples

After reviewing requirements, choose how you want to start. Upload prepared CSV files, enter data manually, or use samples to learn the workflow before using your own data.

Data setup options for upload, manual entry, and examples.
Choose the input method that matches how you want to start.
3

Step 3

Upload the required CSV files

CSV uploadValidation

If you choose CSV upload, check which files your workspace expects. Upload your CSV files and wait for the workspace to parse and validate them.

Required CSV upload cards and validation state.
Check the required CSV files for your selected product before uploading.
4

Step 4

Review setup readiness

ReadinessContinue

After adding your data, scan the scenario overview and readiness checks. Make sure all required data is loaded, the scenario is ready, and the workspace allows the next action.

Setup readiness summary showing valid files and a ready state.
Review readiness before clicking the next action.

Tips

Open the input spec before preparing files for a new product.
Most upload problems come from missing columns, wrong IDs, or date formats.
If a sample works but your upload does not, compare your headers and value formats against the sample.

Related how-to guides

Continue with nearby tasks in the same category.

How to prepare your scenario

Before you upload files or run a workflow, define the scenario you want to solve and make sure your data matches the selected MAG OptiAI workspace.

How to read validation errors

Understand what validation messages mean, where to find them, and how to fix your data or setup before continuing in MAG OptiAI Pro Console.

How to configure and run optimization or scoring

Review your configuration, choose the right solver or scoring settings, run the process, and check the results inside the MAG OptiAI Pro Console.

Next

Keep moving through MAG OptiAI resources

Return to the full how-to library or step back to the resource hub when you want a different kind of guide.