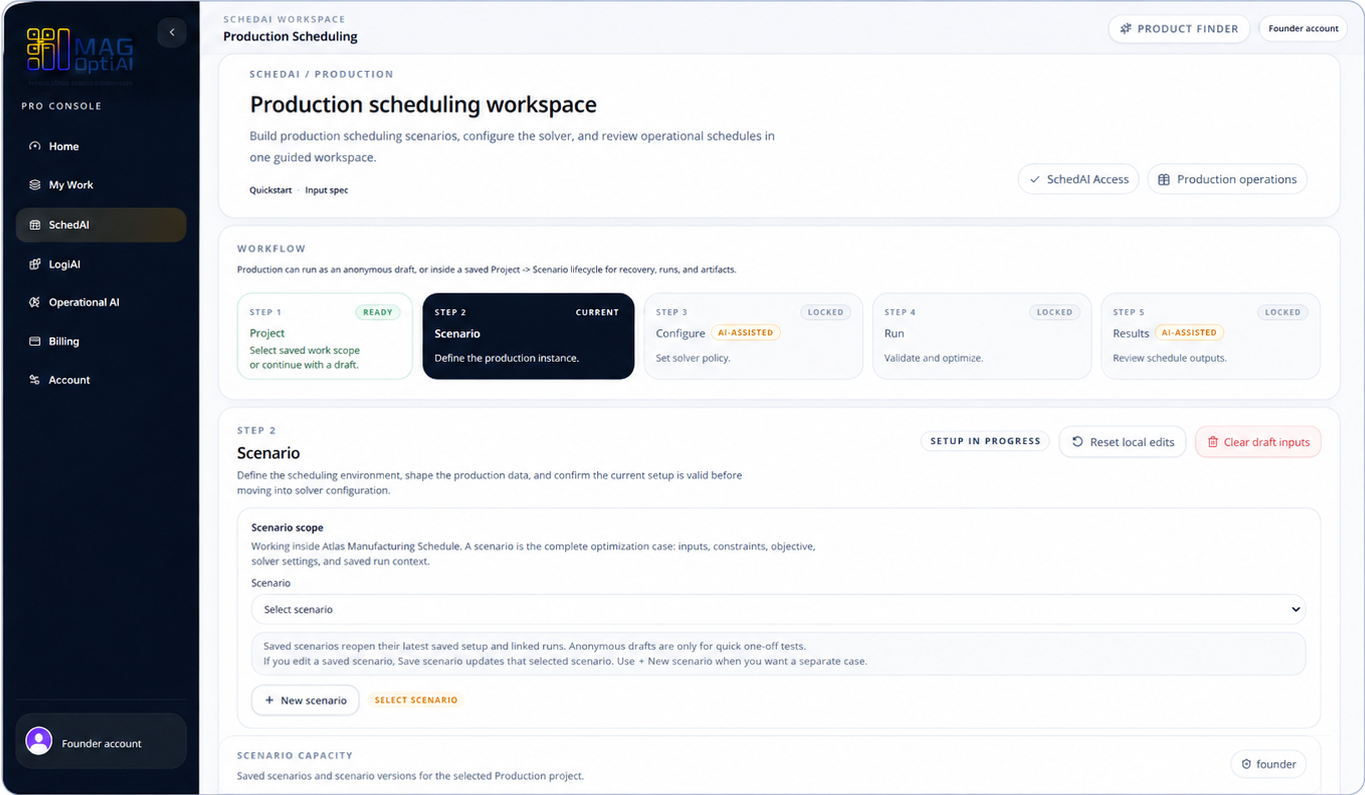
MAG OptiAI

Data and runs How-To

How to prepare your scenario

Before you upload files or run a workflow, define the scenario you want to solve and make sure your data matches the selected MAG OptiAI workspace.

Guide details

Audience

Product users

Time

5 minutes

Category

Data and runs

What this guide covers

Before you upload files or run a workflow, define the scenario you want to solve and make sure your data matches the selected MAG OptiAI workspace.

Understand what a scenario means

Choose a clear scenario name

Open or create the project

Select saved scenarios or start fresh

Review scenario actions

Prepare data next so the workflow can run

Scenario setup

Understand and manage your scenario

Start by defining the operational situation you want to work on. A clear scenario helps you prepare the right data for the selected workspace.

A scenario comes before the data

First decide what operational situation you want to solve. Then prepare the data that represents it.

What is a scenario?

A scenario is the specific operational situation you want MAG OptiAI to solve, analyze, forecast, or support.

Choose a clear scenario

Use a name that is specific enough to guide the data you prepare. Avoid vague labels that will be hard to recognize later.

Step by step

Follow the task path

Each step gives you the action, the reason it matters, and the visual state to look for before continuing.

1

Step 1

Open or create the project

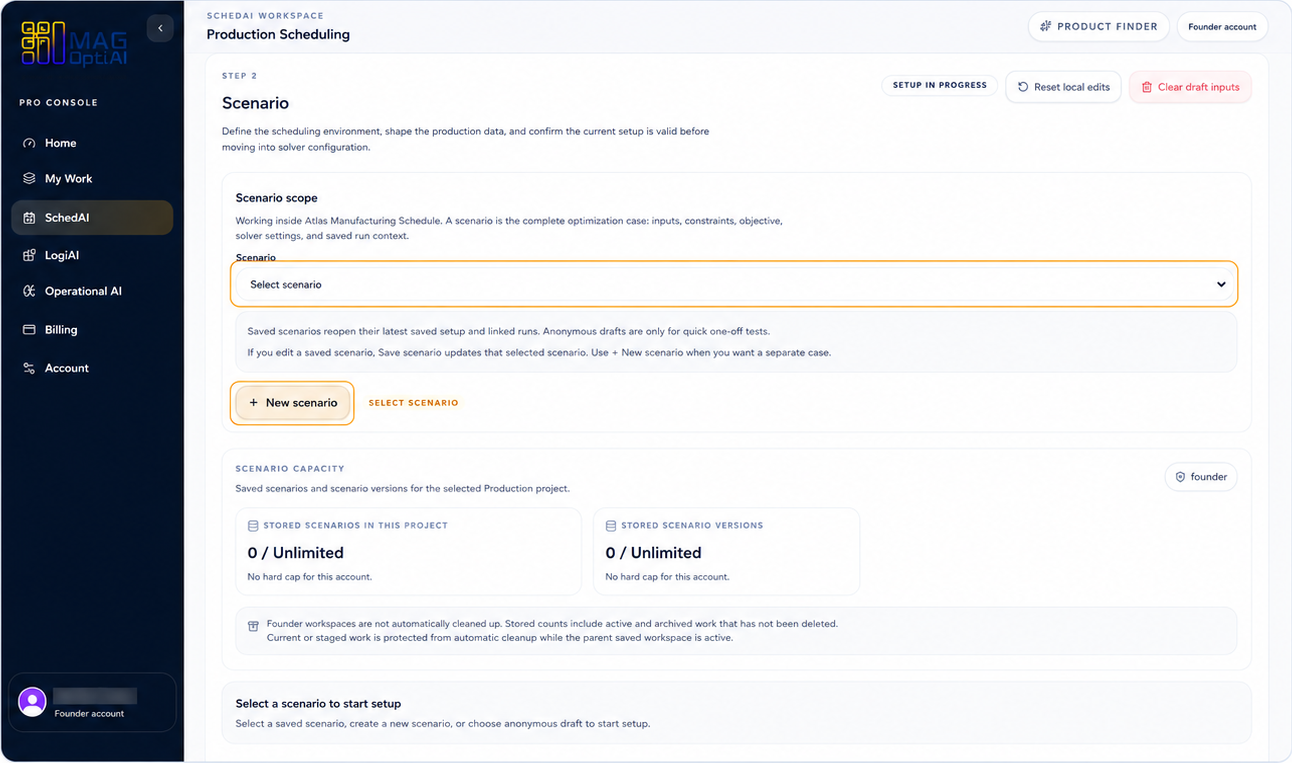
ProjectScenario setup

Start from the workspace and project that should own this work. Open an existing project when the scenario belongs to ongoing work, or create a new project when this is a separate operational case.

Scenario setup inside a product workspace.
Start from the project that should own the scenario, then continue to Scenario.
2

Step 2

Select a saved scenario or start a new one

Saved scenarioNew scenario

Use the scenario dropdown when you already have a saved scenario. Click New scenario when you want to create a separate case for a new operational problem.

Scenario selection controls in a workspace.
Use the dropdown to open a saved scenario, or click New scenario to create a new one.
3

Step 3

Review the scenario and start data setup

Scenario reviewData setup

After the scenario is created or selected, review the scenario details to make sure you are working inside the right context. Then continue into Data setup.

Scenario overview with data setup controls.
Review the scenario details first, then choose how you want to provide the data.
4

Step 4

Understand scenario actions

Clear scenarioArchive scenario

Clear a scenario when you need to remove the current setup and start over. Archive a scenario when it should no longer appear in the active scenario list.

Scenario action dialogs for clearing and archiving a scenario.
Scenario actions can remove active setup or remove a scenario from active lists, so review the confirmation before continuing.

Tips

A scenario comes before the data because it defines what problem the data belongs to.
Use clear scenario names such as location, period, customer, or planning cycle.
Archive old scenarios instead of reusing them for unrelated work.

Related how-to guides

Continue with nearby tasks in the same category.

How to prepare and upload your data

Use this checklist to prepare your data before moving to configuration. Open the input spec, match the required format, upload your files, and confirm the workspace is ready.

How to read validation errors

Understand what validation messages mean, where to find them, and how to fix your data or setup before continuing in MAG OptiAI Pro Console.

How to configure and run optimization or scoring

Review your configuration, choose the right solver or scoring settings, run the process, and check the results inside the MAG OptiAI Pro Console.

Next

Keep moving through MAG OptiAI resources

Return to the full how-to library or step back to the resource hub when you want a different kind of guide.